Woven pincushion
A continuation of the Week of Weaving…
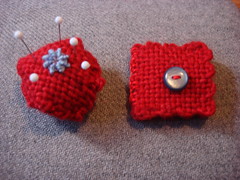
I find it totally amazing that you can use two squares sewn together to a shape as funky as this one.
When I was a kid and would get dragged to my Mom’s quilting meet-ups, many of the ladies had pincushions that looked kinda like this one. I remembered the name sounding something like “biscuit.” It wasn’t until I saw one of the winning entries in the Craft Stitch ‘n Pitch contest that I remembered it was called a biscornu. I thought it would be fun to make a wee one out of 2-inch weavette squares. I hadn’t seen one in ages and was totally surprised (and excited) to see June’s whiplash entry – a tiny biscornu for your wrist! Then, I saw that Miss Wooly was hard at work on a traditional cross stitch biscornu (she also provided a link to a fantastic history and tutorial at Own Two Hands). Time to throw the woven biscornu into the mix!
I have a flickr set tutorial that I will summarize here, but I encourage you to check out June’s and the tutorial at Own Two Hands, as they do an excellent job. The idea is just to offset two squares so that the corners of one square match the midpoint of the sides of the other square (this is the same as turning one of them 1/8 of a turn). It results in a funky little 8 sided pillow. Traditionally it has a button in the middle, pinching everything together – but I omitted it on mine. The pincushion is so tiny that if it gets cinched down, it will be too small for pins!
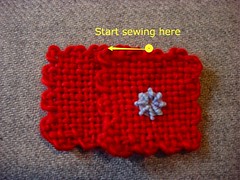
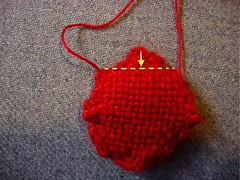
To get started, place the squares on top of each other and offset the top one by half of its length. In this arrangement, the corner of the bottom square is lined up with the midpoint of the top square.
Sew together as indicated in the picture. The next step is to twist the top square so that the midpoint of the top square is lined up with the corner below.
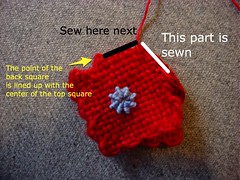
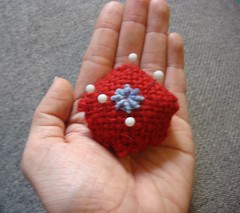
This is the process (twist and sew) that you repeat all the way around until 6 of the 8 sides have been sewn together. Then it is time to stuff it. I used some fiberfill, and the yarn scraps that I had leftover from weaving the squares.
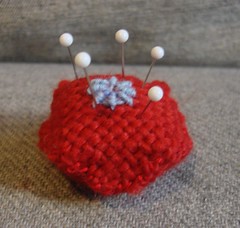
Finally, sew the last two sides. Sit back and admire your handiwork.
If you have a few minutes more, you can make a matching needlebook!