Sniffles – Knitted Tissue cover
The season for colds and coughs is here. I can’t head out of my apartment without a package of tissues in my purse just in case. Inspired by craftapaloola’s tutorial that I read on whipup, I thought I would knit myself a cozy for my mini-pack of tissues. I’ve seen a bunch of adorable sewn cases and thought it was time for the knitters to represent. This project is also perfect for last minute Christmas or holiday gift. (For other quick Christmas gifts, check out my Manos Scarf pattern, and Coaster Pattern).

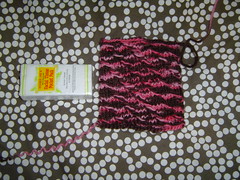
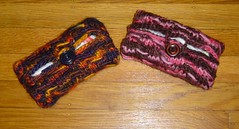
You will need a bit of worsted weight yarn and appropriately sized needles. I used some leftover Ejido from handpaintedyarn.com and size 7 needles – i think the pattern looks extra-nice with variegated yarn. You might want to scrounge up a button or clasp for extra cuteness.
Materials
About an ounce of worsted weight yarn.
Tapestry needle for sewing up edges
US #7 needles
Button
Sharp needle and thread for attaching the button
Crochet hook or double pointed needles for making button loop
Pattern Notes
The pattern is just a stitch pattern on a rectangle that is folded and sewn together. I added selvedge stitches to either side to make it easy to sew up int he end. The first stitch of every row is slipped as if to knit, and the last stitch of every row is purled. It is important to note that the selvedge stitches are slipped with the yarn in the back (knitwise), while the slipped stitches in the patterning are slipped with the yarn in the front (sl wyif).
Pattern
Cast on 26 stitches. I used a long-tail cast-on and it makes a nice decorative edge.
R1 and all WS rows: sl 1, purl remaining stitches.
R2: sl 1, *sl 3 wyif, k3* 4 times, p1
R4: sl 1, k1 * sl 3 wyif, k3* 3 times, sl 3 wyif, k2, p1
R6: sl 1, k2 *sl 3 wyif, k3* 3 times, sl 3 wyif, k1, p1
R8; sl 1, *k3, sl 3 wyif* 4 times, p1
R10: sl 1, sl 1 wyif, *k3, sl 3 wyif* 3 times, k3, sl 2 wyif, p1
R12: sl 1, sl 2 wyif *k3, sl 3 wyif* 3 times, k3, sl 1 wyif, p1
Repeat until cover is about 6.5 inches long, or desired length
Once your tissue cover is about 6.5 inches long, or long enough to wrap around your tissues, bind off. I like mine to have a bit of a tight fit, so that it will remain snug even as the tissues inside get used.
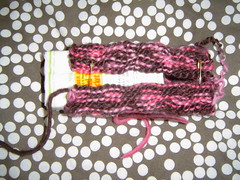
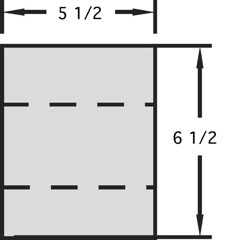
With the wrong side out, fold up the top and bottom to cover the tissues and hold in place with pins. The fold lines are indicated by dashed lines in the pattern schematic.
Sew up the edges. This is made much easier by the selvedge stitches, so even though they are a pain to remember, they are worth it. I also stitch about 1/2 inch along the two edges of the opening on the tissue cover. This helps secure the tissues inside.
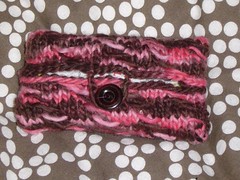
Position and sew on the button. To make a loop for the button, either crochet a short chain, or knit a short i-cord, and attach to the edge of the opening.
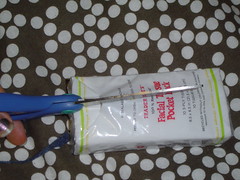
The final step is to add tissues to your cover. The ones i bought open on the short edge, which is not cute, and not compatible with my cozy. I just took a pair of scissors and cut an opening along the long edge. Then I put them inside, and everything is complete.

This work is licensed under a Creative Commons Attribution-Noncommercial-Share Alike 2.5 License.
http://www.girlontherocks.com/knit