Angora handwarmers – a tutorial

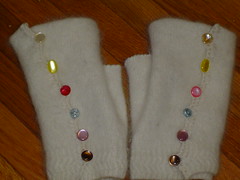
The theme for this month’s whiplash competition is Accessories and this tutorial is my entry. I have been wanting to retire my hobo-style fingerless gloves, and find something more fashionable to keep my hands warm at work. I decided to turn a $2.50 thrift-store angora sweater into a pair of toasty handwarmers. I turned the sleeves of the sweater into a pair of fitted handwarmers, decorated with vintage buttons and a crochet edging.
Skills required:
Basic sewing (machine not necessary, but helpful)
Simple crochet
Knowledge of felting/fulling is also helpful
Materials required
sweater for sacrifice made of wool or a wool/angora blend
needle and thread
10 small buttons
A few yards of sock-weight yarn for the edging (i used knitpicks undyed sock yarn since i had some and it matched).
Felting
To turn the sweater into a dense, warm fabric that I could cut up without fearing unravelling, I felted the sweater. This is a process that involves a lot of agitation and temperature shocking of the natural fibers in the sweater (you can read more about it at knitty). For this reason, your sweater should be a NONwashable type of wool and/or angora with a low synthetic fiber content (less than 10%). mine was 60% angora, 40% wool. Keep your eye out at the thrift store for these. most of the angora sweaters that i have found there have already been accidentally washed and shrunk – a great bargain for you! you could also make this project without felting the object first, but you would need to machine sew all the edges to prevent unravelling.
Okay, on with the felting. i don’t have my own washing machine, so i boiled my sweater on the stove with some harsh detergent, then dumped it into my sink and ran cold water on it while agitating it with a wooden spoon. I am sure i looked like a crafty madwoman, but it worked. I then put it in the dryer to heat up and dry. it is very important that your fabric be completely dry before you start, otherwise you may stretch it and distort it while you work.
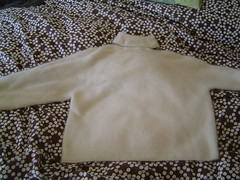
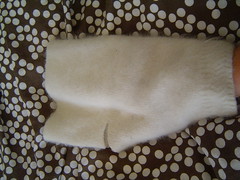
sweater after felting. you can see how it shrunk more in the vertical direction and is a little short looking
Cutting
The wristwarmers only utilize the sleeves of the sweater. the cuff of the sweater will become the cuff of your handwarmer. stick your hand up the sleeve to get an idea of where you will need to cut.
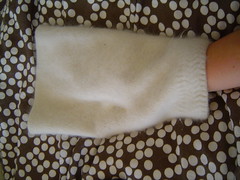
Chop off the sleeve above your fingers.
Put a pin in the fabric to mark the space between your thumb and your hand.
Snip above the thumb:
Trim off the excess fabric as you make a cut down to the pin to define the thumb of your handwarmer:
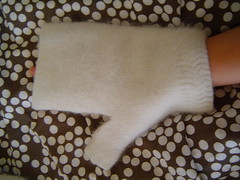
Cutting Complete (for now. don’t put away the scissors)! Now it is time for a bit of sewing.
sewing
We want to accomplish two things in the sewing section:
1) secure the raw edged to prevent fraying (just in case)
2) sew the side seam to close up the handwarmer.
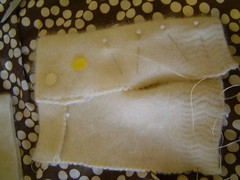
The photo below illustrates where this is going to happen:
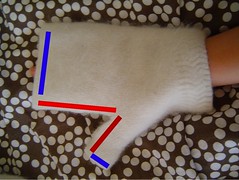
The blue lines indicate where first you should stitch over the edge to secure the fabric. this is probably unnecessary if it has been fully felted, but just in case…. Make sure you don’t sew the finger and thumb openings shut. Next turn the fabric so the wrong side is out. Stitch a seam where indicated by the red lines. When this is complete, you should have a loosely fitting fingerless glove! I folded down the finger edge and pinned it down (to be secured later). this way it will extra thick and toasty when i tuck my fingers in. to create a more fitted glove we will next cut open the other side… get the scissors.
More cutting and attaching buttons
Snip all the way up the edge of the handwarmer on the side opposite the thumb.
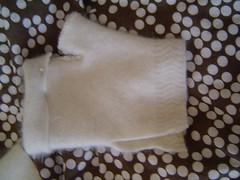
make sure you cut all the way up!
If you want, you can stitch over this edge as well to prevent unravelling. Remember how you folded the finger edge in and tacked it down with a pin “to be secured later”? Now’s the time. i just hand sewed a few stitches that disappeared into the angora fuzz.
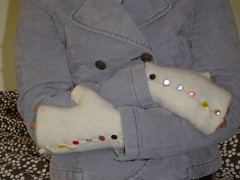
The newly cut opening will be folded over and secured with buttons. Turn the mitt right-side out. Put on the mitt, fold over the freshly cut side edge until it is fitted to your liking, and use pins to mark the location of 5 approximately evenly distributed future button locations. Mine is folded over a lot more at the wrist edge than at the top (obviously since my wrist is narrower than my hand) and it makes a diagonal line of buttons that looks very nice on the finished product. Sew on your buttons where marked with pins.
So close to the end…. you can make it!
Crocheted Edging
The final step is to crochet along the edge to make a decorative edging complete with buttonholes. Keep in mind that I don’t really crochet. there may be more elegant ways to do this, but the final product works and looks good.
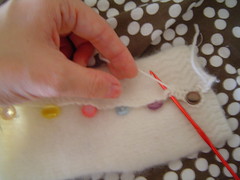
Use the crochet hook to puncture through the edge of the felted fabric and SC along the edge. When you reach a button, chain 5 stitches (maybe more for larger buttons) the reattach with a SC after the button. this creates the buttonhole. I found that i was able to just work along and eyeball where to add the buttonholes. You may want to mark this with pins before you begin. Once you have crocheted all the way up the edge, sew in your ends (yarn and thread) and you have completed your frist handwarmer.
Repeat everything for the other hand, and you will be done! make sure to invert the side for the thumb. Also pay attention to make sure that the buttons are placed on the opposite side so that the two handwarmers will be mirror images of each other.