Drip
I finished a pattern that would make a perfect Christmas gift exchange gift for a co-worker, or even make a few for yourself. Since it was rejected by knitty, i will unleash it onto the world here. What a great way to use up a bit of your leftover sock yarn!
Drip
By Karrie Weaver; karrie at girlontherocks.com
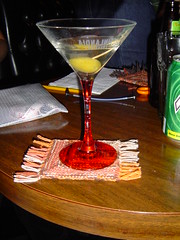
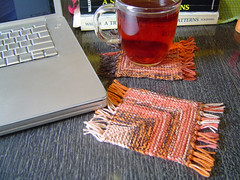
You know how sometimes at work you are pounding down coffee and pretending to get something done, but really you are daydreaming about knitting? This coaster is a way to add a little knitting to your cubicle so you always have a finished object to gaze at. It also makes a cozy home for your coffee or tea mug. Two strands of self-striping sock yarn create a mottled pattern, and the fringe finishes the pattern making it very much like a mini-rug for your mug. Make a single coaster as gift for a co-worker, or use up all your sock yarn scraps and make a set.
SIZE
One size fits most mugs.
FINISHED MEASUREMENTS
4 inches square (without fringe).
MATERIALS
I used leftover sock yarn of unknown origin, but a similar substitute would be:
Lana Grossa Meilenweit Multiringel [80% wool, 20% polyamide; 420m per 100g skein]; each coaster will use less than 100 m.
1 set US #1/2.25mm straight needles
notions required: 1 D/3.25mm Crochet Hook, scissors
GAUGE
This is such a quick project, and useful in so many sizes that it is almost easier to knit a coaster instead of a gauge swatch.
24 sts/48 rows = 4″ in garter stitch

PATTERN NOTES
This pattern uses two strands of sock yarn held together. If you use self-striping sock yarn and would like to preserve the original striping pattern, divide your yarn into two balls and match up the yarns at a color change. For a mottled effect, you can pull one strand from the outside and one strand from the inside of a center-pull ball. This method effectively reverses the striping pattern of one strand.
The shape of the coaster is created by a double decrease at the center of every other row where the center three stitches are decreased to one. The clean edge is the result of slipping the first stitch of every row, and purling the last stitch.
PATTERN
Using the long-tail cast on method CO 49 sts.
Row 1: sl 1, k22, sl 1, k2tog, psso, k22, p1. (47 sts)
Row 2 and all even rows: sl 1, knit until 1 st remains, p1.
Row 3: sl 1, k21, sl 1, k2tog, psso, k21, p1. (45 sts)
Row 5: sl 1, k20, sl 1, k2tog, psso, k20, p1. (43 sts)
Row 7: sl 1, k19, sl 1, k2tog, psso, k19, p1. (41 sts)
Row 9: sl 1, k18, sl 1, k2tog, psso, k18, p1. (39 sts)
Row 11: sl 1, k17, sl 1, k2tog, psso, k17, p1. (37 sts)
Row 13: sl 1, k16, sl 1, k2tog, psso, k16, p1. (35 sts)
Row 15: sl 1, k15, sl 1, k2tog, psso, k15, p1. (33 sts)
Row 17: sl 1, k14, sl 1, k2tog, psso, k14, p1. (31 sts)
Row 19: sl 1, k13, sl 1, k2tog, psso, k13, p1. (29 sts)
Row 21: sl 1, k12, sl 1, k2tog, psso, k12, p1. (27 sts)
Row 23: sl 1, k11, sl 1, k2tog, psso, k11, p1. (25 sts)
Row 25: sl 1, k10, sl 1, k2tog, psso, k10, p1. (23 sts)
Row 27: sl 1, k9, sl 1, k2tog, psso, k9, p1. (21 sts)
Row 29: sl 1, k8, sl 1, k2tog, psso, k8, p1. (19 sts)
Row 31: sl 1, k7, sl 1, k2tog, psso, k7, p1. (17 sts)
Row 33: sl 1, k6, sl 1, k2tog, psso, k6, p1. (15 sts)
Row 35: sl 1, k5, sl 1, k2tog, psso, k5, p1. (13 sts)
Row 37: sl 1, k4, sl 1, k2tog, psso, k4, p1. (11 sts)
Row 39: sl 1, k3, sl 1, k2tog, psso, k3, p1. (9 sts)
Row 41: sl 1, k2, sl 1, k2tog, psso, k2, p1. (7 sts)
Row 43: sl 1, k1, sl 1, k2tog, psso, k1, p1. (5 sts)
Row 45: sl 2, k2tog, psso, k1, p1. (3 sts rem)
Row 47: k2tog, psso (1 stitch remains)
Break yarn and pull through the single remaining stitch until tight.
FINISHING
Weave in ends.
Adding fringe: for additional help watch the video here
Each tassel of fringe is made with two strands of yarn, attached to the edge of the coaster with a crochet hook, and trimmed to an even length. Cut approximately 50 strands of yarn, each about 4.5 inches long. Take two strands held together and fold them in half to make a loop. Insert the crochet hook behind the selvage stitches at the end of the row, and then through the loop you have created. Pull the loop through and leave it on the crochet hook (the ends of the yarn should still be in your hand). Continuing to hold the yarn taut, wrap all of it around the crochet hook and pull it through the loop, attaching it to the edge of the coaster. Pull the strands taught. Repeat this along the side of the coaster. When you have placed fringe on two sides of the coaster, use scissors to trim it to an even length.